Garrado battle #2 made easy
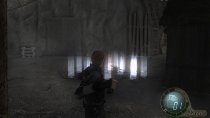
During the second encounter with a Wolverine-like Garrador, when you're trapped in a cage with a rather cheekily-placed treasure chest, you don't have to be confined to battling with the giant menace in such a tight space. Kicking the padlocks off the cage doors will allow you the chance to escape, that much is true, but it takes forever and will no doubt mean that you'll end up taking a few claw swipes during all the chaos. A much more simple way of escaping the cell is by chucking a hand grenade at one of the doors — the padlock will fly straight off and any enemies loitering outside will be killing, allowing you the chance to leave immediately.
Skipping the cutscene that shows the Garrado's entrance will also net you a few additional seconds to perform the life-saving grenade toss. Once you've escaped the cage unscathed, you're free to either let the Garrado take out the few remaining Ganados or to take them out yourself. Afterwards, when it's just you, the Garrado, and one fifteen-foot collection of bars separating you both, you can use the cage as a makeshift barrier and ebb away at the monster's health with your pistol.
A flash in the hand is worth two in the bush
Did you know that the crows of Resident Evil 4 are like flying cash machines? Whenever you happen to kill one, there's a good chance that it'll leave behind a generous chunk of change during its transition to the next world. However, there is one problem: they are lively little so-and-sos and won't make it easy for you to steal their hand-earned savings; shooting one crow will almost always result in its feathery friends being alerted, frightened, and end up flying off to a much less dangerous spot that's out of your reach. The perfect situation to avoid such a scenario would be to chuck a flash grenade into the group — doing so will, for whatever reason, instantly vaporize each and every one of those cawing sacks of gold. The range is really quite impressive, too, with the radius of the flash blanketing a wide area and the vertical distance covered being seemingly limitless. No bullets spent, no hassle, but plenty of gold piles neatly stacked where the poor things were once perched.

Bonus ammo
Whenever a Merchant is nearby, hold off purchasing that 'Capacity' upgrade for your weapons; go ahead and expend whatever rounds you have left in your current magazines/clips by offing a few of the local Ganados, then return to the Merchant without reloading. He'll upgrade the carry capacity for your weapons and he'll even refill your magazines/clips as a freebie.
A knight to remember
Before attempting to tackle the campaign on Professional difficult, you'd be wise to set aside some time to fly through the Separate Ways side-quest, the one that's unlocked after completing the game for the first time. After finishing the Separate Ways segment, you'll be rewarded with two new outfits: a gangster outfit for Leon and a suit of armour for Ashley. Having Ashley wear her armour during your next playthrough will mean that the once-vulnerable blonde will be impervious to most attacks and will no longer be susceptible to being kidnapped — bar for those times where it's needed to progress the story.
Flashin' like a pro
Six Broken Butterfly bullets and two flash grenades — that's all you'll need to whiz your way through this cheeky little ambush from with the "Armadura" knights of Chapter 4-1 during your initial playthrough might have proved somewhat of a challenge for the unsuspecting run 'n' gunner, but on Professional difficulty, these knights can cause quite a bit of bother for even the most hard-boiled of foppy-haired Secret Service agents. There's no shortage of video guides to be found on YouTube, but the most effective strategy, I find, is the one which involves only two weapons.
Upon entering the chamber and collecting the King's Grail, you'll be set upon by the first wave of parasite-addled suits of armour. Whip out the Broken Butterly and go for a headshot on each of the three enemies. One shot of a non-upgraded Broken Butterly to the face will cause the knights to expose their parasites. Don't bother shooting any of them a second time, you just want to use up three bullets in order to have them reveal their slimy tendrils. Run around the room if you have to — you will have to — just don't use two bullets on a single foe. When all of them are showing off their gorgeous, slithery smiles, hurl a single flash grenade into the middle of them to have them wither away into nothingness. Easy peasy. Repeat for the next wave and you'll have just conquered what is perhaps one of the hardest bits of the game in under three minutes. Jolly well done!
Salazar Statue
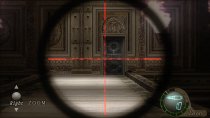
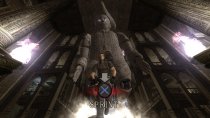
QTEs are not fun. They're really not. Frustrating, yes. Fun, no. In order to make life that little bit easier and the whole "I'm being chased by a giant Salazar statue" that little bit easier, what you can do is whip out the old sniper rifle — or pistol if you fancy yourself something of a good marksman and/or show off — and before initiating the chase sequence, zoom in using that rifle to shoot the padlock off the door that sits at the very end of the platform. It'll mean that you'll shave off valuable seconds by not having to not have to mess about shooting the lock off later on, when there's a giant mechanical statue stalking you.


Rocket man
For some, Salazar can e something of a tough cookie, and make for a tough boss battle. Not even the rocket launcher can kill him in one blast, like most other enemies and bosses. Well, perhaps that's not strictly accurate; you see, immediately whipping out the rocket launcher and firing off a rocket at Salazar's first form right as the battle kicks off will not dish out an instant kill. It'll be a rocket totally wasted, in truth. The ideal way to approach this fight is to cause enough damage to the boss by taking potshots at the mutated Verdugo's eye until Salazar exposes himself, so to speak. When he does so, then that'll be the perfect time to send a rocket hurtling towards his face. Successfully doing so will result in the boss battle ending immediately.
Do a barrel roll!
I'd like to think that Capcom were in some way attempting to pay homage to the original Donkey Kong game when building the rather silly "flaming barrels falling down the stairs" bit that occurs just before the Salazar boss fight. If only it were a barrel of laughs, right? Nevermind. In order to make this frustrating sequence whiz by much quicker, you need only consult your trusty sniper rifle once more, and perch yourself on the wooden walkway — as pictured below — and pick off that pesky lever-pulling Ganado at the top of the stairs. No more flaming barrels, no more grief. Well, except for the grief caused by the other Ganados, that is.

Rocket your way through the mines
During Chapter 4-2, when you're in the mines, you'll be tasked with dashing backwards and forwards in an attempt to lower a minecart from an unreachable part of the tracks and retrieve a bundle of dynamite in order to destroy a giant boulder blocking your path. During all that running about, you'll be swamped by Ganados and chainsaw-wielding "Dr. Salvador" types. While I'd normally recommend going this route and fighting them for the treasures they posses, there is a handy solution for bypassing this sequence if you're running a little low on ammo, or you just want to charge through the game as quickly as possible.
Instead of going through the hassle of acquiring the dynamite, you could always bring a rocket launcher with you and blow the boulder away with one well-placed rocket. Doing so will mean that you will only be required to face a minimal number of enemies whilst on your way deeper into the mine.
Kneecap 'em!
Right-o, this one will primarily only really work on the regular Ganados foot soldiers, but it can really save your neck when you're in a spot of bother. Any gamer who has managed to get some first-person shooter experience under his belt will no doubt instinctively aim for the head — it's a very effective strategy for dealing out swift death in most every game involving a gun. However, and while this is also a valuable approach to combat in Resident Evil 4, it's not always viable in every situation; certain Ganados might be wearing those bullet-proof masks, some might have shields covering their persons, the list goes on. A shot to the chest, belly or arms will likely result in your parasite-riddled adversary promptly shrugging off your attempts and laughing in your face. What might make for a better alternative would be a good, sound kneecapping; a well-placed bullet in the knee-caps will usually result in your enemy dropping to his now-agonizing knees and be susceptible to a devastating suplex — a manoeuvre with a respectably high percentage chance of killing your opponent upon its head-crushing conclusion. Give it a go.