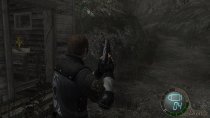
This guide was written whilst playing through the PC version of the game, officially patched up to v1.1.0. There may be one or two discrepancies between the PC and console formats of the game, meaning certain treasures or valuable items might not be located exactly where we detail, but only if you are playing through on any version other than the PC version.
Spinel: Right at the very start of the game, kill the crows shortly ahead of you in order of proximity. Two will usually drop a random amount of PTAS, one will drop a red jewel known as a Spinel. Attempting to shoot one situated further away than the others will most likely result in all of the crows flying off.
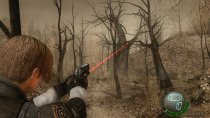
Spinel: After fending off your first lot of Ganados, you'll happen upon a small shack on the right with a typewriter inside. Further down the path from this shack should be a pair of crows just mooching about; kill them and collect one Spinel and perhaps even a bit of cash.
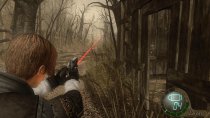
Assistance later on: While not being a treasure per se, you'll earn yourself four-legged a for life and an invaluable boss-battling asset further into the game. Rescuing the dog from the bear trap will mean that the little critter willing to lend a hand — or paw — during the El Gigante boss fight, distracting it and making life much easier for you.
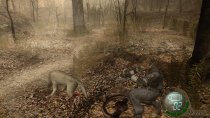
Now, while there are quite a valuables in this area, I wouldn't recommend attempting to collect all of them on your first playthrough. It'll still be tricky for those of you whom are familiar with the game and playing on Professional difficulty, to be honest. To acquire them all treasures in this area requires an awful lot of running — usually away — and ammo management. With that said, let's continue.
Ruby: Despite being one of the rarest and most valuable treasures in the game, I really would not recommend trying to get this one — especially on Professional difficulty — if you place any value on your sanity. The only way to acquire this gem so earl into the game — outside of using cheats or trainers — is by dashing right the way passed all of the regular Ganados, veering off to the left of the bell tower, and continue straight onwards up the path until you reach a chainsaw-wielding Ganado guarding a gate. If you can kill him using what meagre weapons you have on you right now, then you'll earn yourself a ruby which is worth 10,000 PTAS.
I know what you're thinking: you'll just go and grab that shotgun from the nearby house and come back for him, right? Good idea, but such a tactic is impossible. This particular chainsaw Ganado will only stick around for as long as it takes before the bell rings or you make your way into the house. Entering the house will cause a new chainsaw Gannado to spawn, one that carries 10,000 PTAS, effectively meaning there are two individual Ganados in this area.
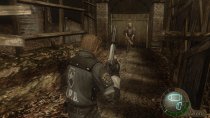
Shotgun: Head into house that's situated next to the bell tower. Once inside, march your way upstairs and claim the shotgun from the wall mount at the very top of the stairs. There'll usually also be a bit of money on a nearby table and some shotgun shells on the bed. Be quick, mind, as a scary-looking guy with a chainsaw will start chasing you if you enter the house before the residents are summoned by the bell toll.
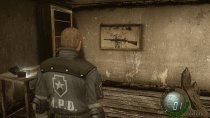
Spinel: Still inside the house, instead of leaving through the front door, make your way over to the window closest to where the shotgun was mounted, and climb out. From here, follow the wooden walkway all the way around the outside of the house until your first shiny Spinel sitting on the accessible part of the roof.
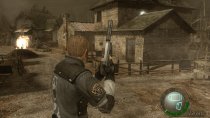
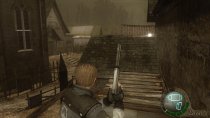
10,000 PTAS: A very, very generous sum for such an early reward, but the requirements for earning it might be a little steep for those of you whom are still getting to grips with the game. Still, if you're determined to challenge yourself, you might as well race your way into the house with the shotgun before the bell rings. A chainsaw-wielding Ganado will be summoned and, provided you can kill him, you'll earn yourself a cool 10,000 PTAS. If you've already killed the Ruby-holding Ganado, then this second one will not show up. We have no idea why.
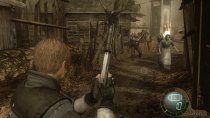
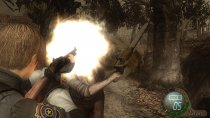
Yellow herb: Close to the huge fire in the center of the hamlet is a cow shed. Head into and pass right through the shed to come to a small wooden crate sitting atop a table. Smash open the crate and collect your first yellow herb.
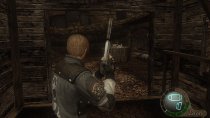
1,000 PTAS: Next to the cow shed will be another house. Go inside and kick open the padlocked door to reveal a small bedroom with some cash just in front of you, and, usually, some shotgun shells in a crate on the cabinet to the side.
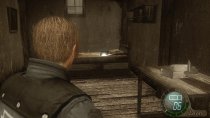
Pearl Pendant or Dirty Pearl Pendant: In between the shack with the typewriter and the cow enclosure — or "pen" for our foreign friends — there resides a well. Dangling from the underside of the roof of the well is your Pearl Pendant. Beware: shooting it down without first blasting away the wooden beam holding up the lid will result in the Pearl Pendant falling into the filthy, maggot-infested well water and becoming the "Dirty Pearl Pendant", an item which is worth substantially less than the regular Pearl Pendant.
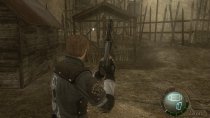
Spinel and 1,000 PTAS: You'll find these two treasures inside a separate pair of cabinets on the ground floor level of the two-storey barn — the only barn with a ladder enabling access to the second floor.
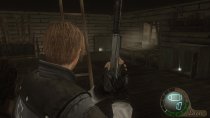
Beerstein: Bit of a tricky one to explain, this, but I'll give it a go. Climb up the ladder to reach the second story of the barn. When you're at the top, hop through the only available window on the left to reach an exterior wooden walkway. From this walkway, you're going to want to position yourself between the two protruding beams that stand directly in front of you, and then drop down to the ground below. Provided you've jumped into just the right spot, then you should be standing in a tight, fenced-off enclosure with a small crate. Smash open the small crate to reveal the potentially very valuable Beerstein. To exit from this wooden prison, push the bookshelf out of the way and continue on your merry way. Make sure not to sell it at the first opportunity, mind, as it's worth an awful lot more when combined with three additional items.
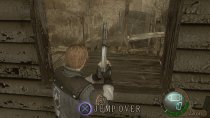
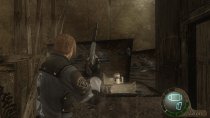
Blue Medallions: Did you happen to notice a number of dangling blue items in this area, or read the notice on one of the trees concerning the Blue Medallions? If not, go and get your eyes checked. If so, you might be looking for a little extra clarification regarding their purposes; I'll tell you this: the medallions are not treasures. However, finding and destroying all seven medallions in this area, and another eight in another area further into the game, will score you an extra handgun — a freebie handgun called the Punisher that is slightly better than your default one. To track down all of the Blue Medallions scattered throughout both this area and the one later on, do consult this handy dandy locations guide.
Two Spinels: After narrowly escaping being crushed by a giant boulder, you'll be staring down a particularly long tunnel. Stuck to the ceiling of this tunnel is a pair of Spinels, one nearby the entrance, and one further down towards the exit. Shoot them down and they'll be all yours.
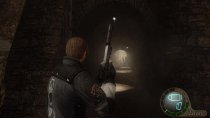
Spinel: There'll be a handful of Ganados waiting for you after leaving the tunnel. Sort 'em out so that you're free to wander the area without disturbance, and make your way over to what would be the first shack on the left after exiting the tunnel. Inside a small crate on a shelf will be your third and final Spinel for the area. There'll be a bear trap on the floor — watch out!
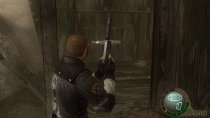
Red Catseye: Just in front of the spooky-looking house will be a tree with a bird's nest. Shoot the nest, rendering a crow or two homeless, and laugh all the way to the bank with your new Red Catseye gemstone.
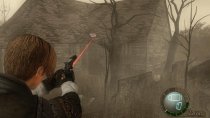
Random amount of PTAS: Behind the tree with the bird's nest and right in between the spooky house and another tree will be a rather sneakily-placed crate. Smash it open to see what's inside, if anything. I was fortunate enough to score myself a very tidy 1,400 PTAS, being the lucky so-and-so that I am, but you might uncover an even more substantial reward.
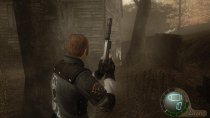
1,000 PTAS: There's a distinct Blair Witch vibe to this eerie house. Hmm. Anyhoo, your next treasure will be sitting inside a cabinet nearest the far-right corner of the first room of the house.
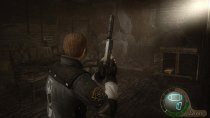
1,000 PTAS: Sitting atop the table in the room with the moveable bookshelf, two rooms away from the typewriter room treasure. Tip: save a bullet, don't bother shooting the explosives on the wall. The gold can be picked up with triggering the C4 and there are no further treasures in this area.
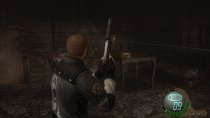
Yellow herb and a random amount of PTAS: Just in front of the door which requires the Hexagonal Emblem to be opened, there'll be a shack. Inside the shack will be two lockers. Within these two lockers lies your gold and your yellow herb, respectively.
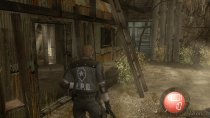
Spinel: After entering and clearing the part of the warehouse with the enemies flinging dynamite at you from behind cover, in the same area as the bear traps, examine the two furnaces in this area; one will contain — more often than not — a pack of handgun bullets and the other a Spinel.
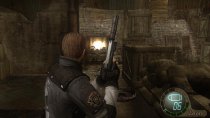
Elegant Mask: Upon exiting the very same room that contained the previous Spinel, pull a hard left and smash down the remarkably weak array of wooden boards blocking off entry into a side room. Once they've been demolished, hop in there and claim your rather expensive Elegant Mask prize from the wall on the left.
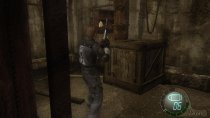
Misc. goodies: Just before climbing the ladder to reach the surface, dive into the sewer-like, boxed-in area with the waist-high water and giant fish. There'll usually be a trio of randomly generated items waiting for you here, but it's the swimming black bass that are the real treasure. Shooting them and killing them will mean that you're able to collect them and either use them as a handy healing alternative or sell them to a Merchant for a decent amount of money.
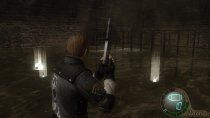
Random amount of PTAS: Shoot the crows that lie slightly further up the path, near the bear traps and explosives, in order of closest proximity and they will usually leave behind a generous amount of gold.
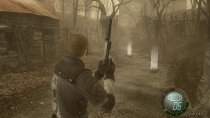
Brass Pocket Watch or Dirty Brass Pocket Watch: After picking off the crows, turn around to your left and you'll likely notice this particularly shiny item hanging from the underside of a well's roof, almost calling for your attention. Shoot the beam holding up the lid of the well in order to cover its filthy wet contents, then shoot down the Brass Pocket Watch for it to land onto a much safer and dryer surface. If for some reason you would much rather take the infinitely less valuable Dirty Brass Pocket Watch, don't bother shooting down the covering; just shoot down the item.
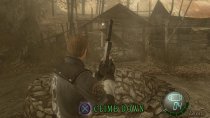
1,000 PTAS: After reaching the bedroom of the abandoned house, the very same room where the chest containing the Insignia Key is found, check the wardrobe next to the bed to discover the stash of gold.
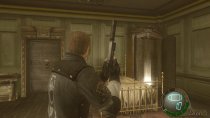
1,000 PTAS: When you reach the bottom floor of this especially creepy — but admittedly well-kept — house, instead of making your way out through the front door which leads to the lunatic with the chainsaw, pull a 180 and head towards the back of the house, closely hugging the left wall. If you follow it along far enough, you'll come to a little nook of the house with a bookshelf and a cabinet. Inside the cabinet is your cash.
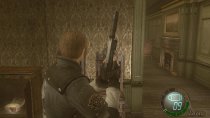
Ruby: Upon leaving the house, you'll be greeted by a nutter with a chainsaw. Kill him and he'll drop a ruby.
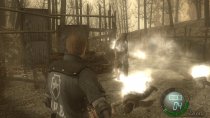
Spinel: Just head a little further down the lane where the chainsaw geezer first popped up from and you'll come across a tree with a bird's nest just aching to be blown away. Pull out the ol' handgun, shoot it, and watch as the Spinel drops to your feet, almost submissively.

Spinel: After using the Insignia Key and gaining access to the Ganados super secret club house, you'll be in a room with a typewriter. Continue onwards to the next room which features a ladder leading into underground, and a lantern filled hover just above and in front of it. Back up as far as you can, then shoot the lantern, which will drop to the floor in an explosion of flames, before dying down and revealing a Spinel.
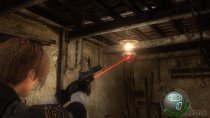
Elegant Headdress and two Spinels: As odd as this one might sound — hear me out. After having jumped down into the dingy cave-like tunnel, keep moving onwards until you come to a slightly more open area with yet another lantern hovering overhead. This time, when we shoot the lantern, it won't drop a piece of treasure; it'll instead reveal the locations of three other treasures that'll be clinging to the tunnel ceiling. Once the lantern has been destroyed, the trio of valuables will sparkle like crazy. Make sure to shoot them all down and collect them, as missing out on the Elegant Headdress would be a crime.
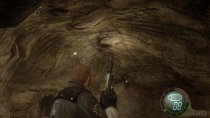
Bonus PTAS: Shoot any crows that you might come across. They'll usually be lingering around on top of various gravestones.
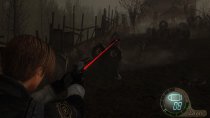
Blue Medallions: The second and final batch of medallions can be found in this area. Please make sure to consult this guide for a fairly thorough run-down of where to find them.
Green Catseye: Make your way around to the back of the church and solve the insignia puzzle.
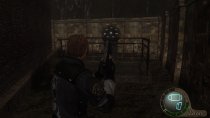
Bonus PTAS: Fling a flash grenade into the center of the gathering of crows. They'll drop an absurd amount of money.
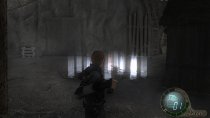
Spinel: After killing the group of crows, make your way over to the abandoned cart on the left. Sitting atop the cart will be a Spinel.
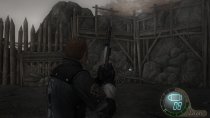
Spinel: This second Spinel will be hiding in the hut closet to the entrance. Don't be afraid to raid the other two huts, too, as there'll usually some ammo or a herb in one or the other.
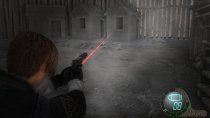
Spinel: After once again escaping certain death from what appears to be a heat-seeking boulder, turn around when you regain full control of Leon and you'll notice the Spinel sparkling away like nobody's business, stuck to the side of a mountain, right behind you.
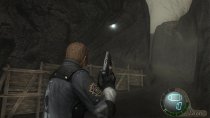
Antique Pipe: This one's a little more tricky to demonstrate the location to, unfortunately. The item is essentially sitting in a bird's nest, in a tree, just slightly over half way into the marsh after making your way over to second half of the bridge. Clinging to the southern-most mountainous border and following it along will bring you to where the small patch of land where the tree resides. Once you get there, shoot the bird's nest to have the Antique Pipe come falling to a much more accessible spot.
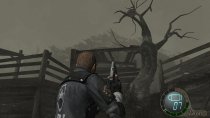
Gold Bangle w/ Pearls: As you head down the narrow path towards the dock, you'll pass by a few trees on the left; one of these trees will have a bird's nest perched on one of its branches, shoot down the bird's nest to claim your next treasure.
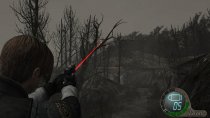
Yellow Herb: Still heading down the very same narrow path, march your way into the first shack on the right and smash open the crate to reveal another yellow herb that's ready for collection.

Spinel: Right at the very start of the game, kill the crows shortly ahead of you in order of proximity. Two will usually drop a random amount of PTAS, one will drop a red jewel known as a Spinel. Attempting to shoot one situated further away than the others will most likely result in all of the crows flying off.

Spinel: After fending off your first lot of Ganados, you'll happen upon a small shack on the right with a typewriter inside. Further down the path from this shack should be a pair of crows just mooching about; kill them and collect one Spinel and perhaps even a bit of cash.

Assistance later on: While not being a treasure per se, you'll earn yourself four-legged a for life and an invaluable boss-battling asset further into the game. Rescuing the dog from the bear trap will mean that the little critter willing to lend a hand — or paw — during the El Gigante boss fight, distracting it and making life much easier for you.

Hamlet
Now, while there are quite a valuables in this area, I wouldn't recommend attempting to collect all of them on your first playthrough. It'll still be tricky for those of you whom are familiar with the game and playing on Professional difficulty, to be honest. To acquire them all treasures in this area requires an awful lot of running — usually away — and ammo management. With that said, let's continue.
Ruby: Despite being one of the rarest and most valuable treasures in the game, I really would not recommend trying to get this one — especially on Professional difficulty — if you place any value on your sanity. The only way to acquire this gem so earl into the game — outside of using cheats or trainers — is by dashing right the way passed all of the regular Ganados, veering off to the left of the bell tower, and continue straight onwards up the path until you reach a chainsaw-wielding Ganado guarding a gate. If you can kill him using what meagre weapons you have on you right now, then you'll earn yourself a ruby which is worth 10,000 PTAS.
I know what you're thinking: you'll just go and grab that shotgun from the nearby house and come back for him, right? Good idea, but such a tactic is impossible. This particular chainsaw Ganado will only stick around for as long as it takes before the bell rings or you make your way into the house. Entering the house will cause a new chainsaw Gannado to spawn, one that carries 10,000 PTAS, effectively meaning there are two individual Ganados in this area.

Shotgun: Head into house that's situated next to the bell tower. Once inside, march your way upstairs and claim the shotgun from the wall mount at the very top of the stairs. There'll usually also be a bit of money on a nearby table and some shotgun shells on the bed. Be quick, mind, as a scary-looking guy with a chainsaw will start chasing you if you enter the house before the residents are summoned by the bell toll.

Spinel: Still inside the house, instead of leaving through the front door, make your way over to the window closest to where the shotgun was mounted, and climb out. From here, follow the wooden walkway all the way around the outside of the house until your first shiny Spinel sitting on the accessible part of the roof.


10,000 PTAS: A very, very generous sum for such an early reward, but the requirements for earning it might be a little steep for those of you whom are still getting to grips with the game. Still, if you're determined to challenge yourself, you might as well race your way into the house with the shotgun before the bell rings. A chainsaw-wielding Ganado will be summoned and, provided you can kill him, you'll earn yourself a cool 10,000 PTAS. If you've already killed the Ruby-holding Ganado, then this second one will not show up. We have no idea why.


Yellow herb: Close to the huge fire in the center of the hamlet is a cow shed. Head into and pass right through the shed to come to a small wooden crate sitting atop a table. Smash open the crate and collect your first yellow herb.

1,000 PTAS: Next to the cow shed will be another house. Go inside and kick open the padlocked door to reveal a small bedroom with some cash just in front of you, and, usually, some shotgun shells in a crate on the cabinet to the side.

Farm
Pearl Pendant or Dirty Pearl Pendant: In between the shack with the typewriter and the cow enclosure — or "pen" for our foreign friends — there resides a well. Dangling from the underside of the roof of the well is your Pearl Pendant. Beware: shooting it down without first blasting away the wooden beam holding up the lid will result in the Pearl Pendant falling into the filthy, maggot-infested well water and becoming the "Dirty Pearl Pendant", an item which is worth substantially less than the regular Pearl Pendant.

Spinel and 1,000 PTAS: You'll find these two treasures inside a separate pair of cabinets on the ground floor level of the two-storey barn — the only barn with a ladder enabling access to the second floor.

Beerstein: Bit of a tricky one to explain, this, but I'll give it a go. Climb up the ladder to reach the second story of the barn. When you're at the top, hop through the only available window on the left to reach an exterior wooden walkway. From this walkway, you're going to want to position yourself between the two protruding beams that stand directly in front of you, and then drop down to the ground below. Provided you've jumped into just the right spot, then you should be standing in a tight, fenced-off enclosure with a small crate. Smash open the small crate to reveal the potentially very valuable Beerstein. To exit from this wooden prison, push the bookshelf out of the way and continue on your merry way. Make sure not to sell it at the first opportunity, mind, as it's worth an awful lot more when combined with three additional items.


Blue Medallions: Did you happen to notice a number of dangling blue items in this area, or read the notice on one of the trees concerning the Blue Medallions? If not, go and get your eyes checked. If so, you might be looking for a little extra clarification regarding their purposes; I'll tell you this: the medallions are not treasures. However, finding and destroying all seven medallions in this area, and another eight in another area further into the game, will score you an extra handgun — a freebie handgun called the Punisher that is slightly better than your default one. To track down all of the Blue Medallions scattered throughout both this area and the one later on, do consult this handy dandy locations guide.
Boulder-trap path
Two Spinels: After narrowly escaping being crushed by a giant boulder, you'll be staring down a particularly long tunnel. Stuck to the ceiling of this tunnel is a pair of Spinels, one nearby the entrance, and one further down towards the exit. Shoot them down and they'll be all yours.

Spinel: There'll be a handful of Ganados waiting for you after leaving the tunnel. Sort 'em out so that you're free to wander the area without disturbance, and make your way over to what would be the first shack on the left after exiting the tunnel. Inside a small crate on a shelf will be your third and final Spinel for the area. There'll be a bear trap on the floor — watch out!

Red Catseye: Just in front of the spooky-looking house will be a tree with a bird's nest. Shoot the nest, rendering a crow or two homeless, and laugh all the way to the bank with your new Red Catseye gemstone.

Random amount of PTAS: Behind the tree with the bird's nest and right in between the spooky house and another tree will be a rather sneakily-placed crate. Smash it open to see what's inside, if anything. I was fortunate enough to score myself a very tidy 1,400 PTAS, being the lucky so-and-so that I am, but you might uncover an even more substantial reward.

Spooky house
1,000 PTAS: There's a distinct Blair Witch vibe to this eerie house. Hmm. Anyhoo, your next treasure will be sitting inside a cabinet nearest the far-right corner of the first room of the house.

1,000 PTAS: Sitting atop the table in the room with the moveable bookshelf, two rooms away from the typewriter room treasure. Tip: save a bullet, don't bother shooting the explosives on the wall. The gold can be picked up with triggering the C4 and there are no further treasures in this area.

Gorge settlement
Yellow herb and a random amount of PTAS: Just in front of the door which requires the Hexagonal Emblem to be opened, there'll be a shack. Inside the shack will be two lockers. Within these two lockers lies your gold and your yellow herb, respectively.

Warehouse
Spinel: After entering and clearing the part of the warehouse with the enemies flinging dynamite at you from behind cover, in the same area as the bear traps, examine the two furnaces in this area; one will contain — more often than not — a pack of handgun bullets and the other a Spinel.

Elegant Mask: Upon exiting the very same room that contained the previous Spinel, pull a hard left and smash down the remarkably weak array of wooden boards blocking off entry into a side room. Once they've been demolished, hop in there and claim your rather expensive Elegant Mask prize from the wall on the left.

Misc. goodies: Just before climbing the ladder to reach the surface, dive into the sewer-like, boxed-in area with the waist-high water and giant fish. There'll usually be a trio of randomly generated items waiting for you here, but it's the swimming black bass that are the real treasure. Shooting them and killing them will mean that you're able to collect them and either use them as a handy healing alternative or sell them to a Merchant for a decent amount of money.

Path to seemingly abandoned house
Random amount of PTAS: Shoot the crows that lie slightly further up the path, near the bear traps and explosives, in order of closest proximity and they will usually leave behind a generous amount of gold.

Brass Pocket Watch or Dirty Brass Pocket Watch: After picking off the crows, turn around to your left and you'll likely notice this particularly shiny item hanging from the underside of a well's roof, almost calling for your attention. Shoot the beam holding up the lid of the well in order to cover its filthy wet contents, then shoot down the Brass Pocket Watch for it to land onto a much safer and dryer surface. If for some reason you would much rather take the infinitely less valuable Dirty Brass Pocket Watch, don't bother shooting down the covering; just shoot down the item.

Mysterious house
1,000 PTAS: After reaching the bedroom of the abandoned house, the very same room where the chest containing the Insignia Key is found, check the wardrobe next to the bed to discover the stash of gold.

Mysterious house
1,000 PTAS: When you reach the bottom floor of this especially creepy — but admittedly well-kept — house, instead of making your way out through the front door which leads to the lunatic with the chainsaw, pull a 180 and head towards the back of the house, closely hugging the left wall. If you follow it along far enough, you'll come to a little nook of the house with a bookshelf and a cabinet. Inside the cabinet is your cash.

Ruby: Upon leaving the house, you'll be greeted by a nutter with a chainsaw. Kill him and he'll drop a ruby.

Spinel: Just head a little further down the lane where the chainsaw geezer first popped up from and you'll come across a tree with a bird's nest just aching to be blown away. Pull out the ol' handgun, shoot it, and watch as the Spinel drops to your feet, almost submissively.

Insignia house
Spinel: After using the Insignia Key and gaining access to the Ganados super secret club house, you'll be in a room with a typewriter. Continue onwards to the next room which features a ladder leading into underground, and a lantern filled hover just above and in front of it. Back up as far as you can, then shoot the lantern, which will drop to the floor in an explosion of flames, before dying down and revealing a Spinel.

Underground tunnel
Elegant Headdress and two Spinels: As odd as this one might sound — hear me out. After having jumped down into the dingy cave-like tunnel, keep moving onwards until you come to a slightly more open area with yet another lantern hovering overhead. This time, when we shoot the lantern, it won't drop a piece of treasure; it'll instead reveal the locations of three other treasures that'll be clinging to the tunnel ceiling. Once the lantern has been destroyed, the trio of valuables will sparkle like crazy. Make sure to shoot them all down and collect them, as missing out on the Elegant Headdress would be a crime.

Cemetery
Bonus PTAS: Shoot any crows that you might come across. They'll usually be lingering around on top of various gravestones.

Blue Medallions: The second and final batch of medallions can be found in this area. Please make sure to consult this guide for a fairly thorough run-down of where to find them.
Green Catseye: Make your way around to the back of the church and solve the insignia puzzle.

Arena
Bonus PTAS: Fling a flash grenade into the center of the gathering of crows. They'll drop an absurd amount of money.

Spinel: After killing the group of crows, make your way over to the abandoned cart on the left. Sitting atop the cart will be a Spinel.

Spinel: This second Spinel will be hiding in the hut closet to the entrance. Don't be afraid to raid the other two huts, too, as there'll usually some ammo or a herb in one or the other.

Marshes
Spinel: After once again escaping certain death from what appears to be a heat-seeking boulder, turn around when you regain full control of Leon and you'll notice the Spinel sparkling away like nobody's business, stuck to the side of a mountain, right behind you.

Antique Pipe: This one's a little more tricky to demonstrate the location to, unfortunately. The item is essentially sitting in a bird's nest, in a tree, just slightly over half way into the marsh after making your way over to second half of the bridge. Clinging to the southern-most mountainous border and following it along will bring you to where the small patch of land where the tree resides. Once you get there, shoot the bird's nest to have the Antique Pipe come falling to a much more accessible spot.

Lakeside path
Gold Bangle w/ Pearls: As you head down the narrow path towards the dock, you'll pass by a few trees on the left; one of these trees will have a bird's nest perched on one of its branches, shoot down the bird's nest to claim your next treasure.

Yellow Herb: Still heading down the very same narrow path, march your way into the first shack on the right and smash open the crate to reveal another yellow herb that's ready for collection.
