Don't expect your journey through Resident Evil 4 to be a walk in the park. Oh no. On top of all the less-than-cheery village folk that you'll have to contend with, there'll also be a generous smattering of 'bosses' to test your mettle against. It might not be easy, but we're here to hold your hand through it all, because we're cool like that.
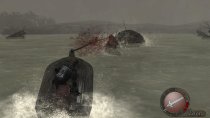
Encountered: At the very end of Chapter 1-3.
Thankfully, your first boss is also the easiest one in the game. All that is required of you is to chuck a load of spears at the monster whilst simultaneously making sure you don't become its supper. It's recommended that you only attempt to throw the spears when the monster has its back to you, dragging you along with it, as this is the time where it is most vulnerable. When it's not pulling you along in your rickety little boat, it'll likely be pulling a U-turn and trying to catch a quick nibble of you. If it does — no problem. You'll need to bash away at a certain button to return to your boat before the creature can catch you, but it's not especially difficult to dodge its attack, in truth. Simply holding down either the left or right button on your D-pad when the monster is submerged will allow you to evade the monster's lunge attacks.
A few spear-chucks later, and the Del Lago will try a charge attack. You'll know when it's about to attempt this when your boat is suddenly immobilized and all appears still and quiet in the water. On-screen prompts will notify you as to where the monster will be charging in from, and you'll have more than enough time to launch a spear into its gob. You only need to hit it once during its run-up to have it abandon its charge, and it's not exactly a difficult target to miss, given its humongous size.
In summary: Repeat these steps until the beast's death: chuck arrows at the monster while it's pulling your board, hold either left or right on the D-pad while its submerged (but still dragging you), throw a spear or two into its mouth while you're stationary and it's swimming towards you. Easy peasy.
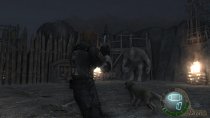
Encountered: Roughly three-quarters of the way through Chapter 2-1, after acquiring the Round Insignia.
Don't bother hiding in any of the three shacks — El Gigante, despite looking a bit dippy, is clever enough to squash them with you inside. Your best bet is to keep plenty of space between the two of you and rattle off a few rounds into his mutated centipede-like spine whenever he's not within swinging, smashing, or stamping distance. There isn't an awful lot of strategy involved with defeating the creature, to be honest. Just make sure to watch out for those QTEs infrequently popping up, whereby he'll either attempt to charge into you or throw something quite large in your direction. If you, for whatever reason, attempt to get too close, he will grab and crush you with his hands, potentially dealing a tremendous amount of damage, and requiring you to engage in yet another infuriating QTE sequence to escape.
When he's taken enough bullets, the monster will drop to his knees, exposing the huge, vulnerable parasite on his back. At this point, he'll be rendered immobile. Race up to him and follow the sequence of button prompt that appear on-screen to deal a great deal of damage to him.
If you were kind enough to rescue the wolf during the first chapter by releasing him from the bear trap, then your four-legged friend will, partway into the battle, turn up to keep the monster distracted while you squeeze off a few much-needed slugs, uninterrupted. The dog is invincible, too, so you needn't worry about the little fella.
He can still be a wee bit tricky, though, on the Professional difficulty, especially. Do bear in mind that if you really aren't having much luck with taking this literal giant down, you canalways return to the nearby Merchant to either upgrade your current weapons or purchase a rocket launcher — a weapon capable of killing El Gigante in one hit.
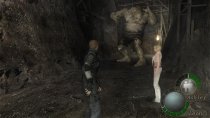
Encountered: Near the beginning of Chapter 2-3, but only upon choosing the right-side path.
It's difficult to call this second confrontation with an El Gigante a "boss battle", as you can, if you so wish, just run away and escape without firing a single shot or taking even a scrap of damage. In fact, I'd strongly urge you to just flee from him. If you have spare rocket launcher handy, then, sure, go nuts and blow him away to receive a handy 15,000 PTAS, but you're better off just making a dash for the exit and hurriedly picking up any treasure along the way as you go.
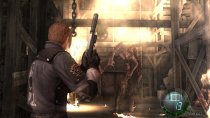
Encountered: Near the end of Chapter 2-3.
He's a big guy, that much is true, but he shouldn't give you much grief — at least during the first half of the fight. When the battle begins, immediately spin around and climb the ladder which leads to the second floor of the barn. From here, it's just a case of positioning yourself in such a position whereby you can see over the lip of the second floor, down to the floor below where the boss will remain, getting a few shots off before Mendez can get too close, then dash to a different point to repeat the procedure. If you have a plentiful reserve of bullets and time on your hands, then use the handgun, otherwise, opt for the shotty. Do bear in mind, though, that staying in the same place for too long will result in Mendez getting close enough to hack away at you and you'll just end up taking too much damage. He moves slow, so don't feel that you need to hurry too much — you should be able to get 3-6 shots off on average if you play it cool and take your time. With the shotgun, if you can pump 3-4 shots into him in succession, Mendez will be momentarily stunned, allowing for you to get one or two bonus shells into him.
If you do get hit, you'll end up being knocked down to the floor below, where you will need to race your way back to the second floor before Mendez can grab you and deal a shed load of damage. Be quick.
The second half of the battle will consist of a now-legless-Mendez swinging from various beams and trying to get close to you so that he can slash at you with his tendril. Whenever he retreats to the rafters, use this as your opportunity to dash to the opposite end of the barn. He'll eventually drop to beams nearer to your level and will swing towards you, use this time to get unload some shotgun shells into him. If he gets to close, chuck a flash grenade to temporarily immobilize him and get to work with your shotty. He'll repeat his pattern of retreating to the rafting and flanking you until dead, so don't worry about any nasty surprises — he's quite a straightforward boss, really.
Note: Don't bother using the rocket launcher, it won't be an instant kill. It'll hurry things along onto the second half of the fight, but considering that the first half isn't especially difficult, it just wouldn't make for a cost-effective strategy.
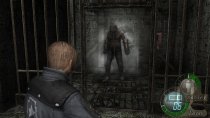
Encountered: In the prison area, towards the end of Chapter 3-1.
The Garrador is perhaps more of a mini-boss than anything else, but he'll certainly give most unsuspecting gamers a run for their money if they attempt to tackle him unprepared. Here's the deal (and this strategy is largely the same for most every dealing you might have with him): he's blind. You could be standing 15-feet in front of him and he'll have no clue that you're there. Having said that, his hearing is frighteningly acute. Whilst fighting this monster, don't even think about running, unless he's either flailing from injury, fighting to free himself after burying his claws from the wall, or preoccupied with those ringing bells. I'd suggest going no faster than a brisk walking pace when making your way around the dungeon. His attacks consist of either a wild barrage of slashes, or a charge attack followed by a barrage of slashes.
His weakness, you see, is that vulnerable little parasite on his back. You can't miss it, it's practically calling out to you with in its own vile, pulsating way. Getting him to expose his back requires that you keep the noise down so that he might believe that you've escaped. In which case, he'll continue his patrol and will inevitably have his back to you before long. Whip out your trusty shotgun and fire off a blast into the parasite before he becomes wary of your plan. Do please bear in mind that, even when walking, getting too close to the Garrador will result in the creature launching into a nightmarish thrashing of sharp metal.
Another perfectly viable — and recommended — tactic would be to make use of those two large bells situated on opposite walls of this area. Shooting them from a distance with your pistol will cause the monster to lunge frantically towards the bell, leaving his weak spot open to attack. Unfortunately, the bells will only be able to act as a diversion for so long before the Garrador completely destroys them.
And the third, equally suitable solution for distracting the Garrador would be to make some distance between yourself and him, fire off a single handgun round into any part of him (ideally the parasite if you can) and race out of the way before he comes storming his way into your direction. He moves fast, so you'll need to act fast. Provided you were able to steer clear of his attack, there's a good chance that he'll have have shot right past you and managed to get his claw lodged into the wall. Use this opportunity to get off another shot or two.
Stick to those three strategies and you'll be as right as rain.
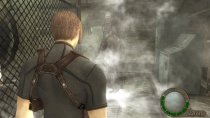
Encountered: Towards the end of Chapter 4-1.
Even though Salazar's "Right Hand" will have been chasing your beforehand, tormenting you with incessant QTEs, the fight only really properly begins when you've thrown the switch and restored the elevator power; it'll be then that the creature skulks out of the shadows and reveals himself, so to speak. Before the actual fighting part between the two of your commences, know that you're trapped in a very small, very cramped arena with which to battle the monster. If you don't happen to have any demolition weapons on you, such as a rocket launcher, mine thrower or even grenades, then you'd probably be better off saving whatever remaining munitions you have and riding out the fight by running around the central generator, in circles, until the shutter door opens once again, allowing for your escape. You'll also be wanting to occasionally knock over the liquid nitrogen canisters lying around here and there, as the monster approaches, in order to temporarily freeze it and grant some fleeting time to yourself.
Otherwise, if you do have the firepower handy and fancy scoring yourself a very rare 'Crown Jewel' treasure, you might as well make use of that rocket launcher that you should have picked up during Chapter 3-4. Firstly, when the boss battle begins, race past the monster and push over the first liquid nitrogen canister you come across, as you're being stalked, causing the cannister to expel its chilling charms and immobilize the creature. Use this opportunity to sling out the ever-reliable rocket launcher and blow the thing to kingdom come, killing it with a single, satisfying rocket blast. The Verdugo simply has far too much health and armour for you to even consider using most every other weapon, including the Broken Butterly.
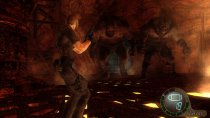
Encountered: Halfway through Chapter 4-2.
As terrifying as the premise might first sound, battling two El Gigantes can be made all the more easier by making use of the trapdoor in the centre of the room: Lure an unsuspecting El Gigante over the hatch, flip the nearby switch, and watch as it plummets into the lava pit below to be slowly incinerated. However, please note that making use of this trick will mean that your 30,000 PTAS reward for killing the monsters will be halved, with 15,000 PTAS literally go up in flames; it's still a much more appealing option to fighting the two ogres head-on. If you fancy a challenge and want to take the pair of them on: jolly good luck to you. You'll need to make full use of your Broken Butterly and make sure to be quite lively on your toes. We'd recommend taking advantage of the lava method, in truth, and making life much easier to only having to contend with one enemy to fight. Unfortunately, the lever will become 'locked' after eliminating the first monster, so don't rely on it to save your skin against both of them.
If you do happen to go ahead with our preferred approach of using the lava to your advantage, make sure not to go too near the pit while the trapdoor is open, or the monster will reach out, grab you and pull you in. Give it some time for the giant to finish flailing and for the hatch to close by itself. Once the doors have slammed shut, you'll be free to roam the chamber as you please, albeit as freely as one can do with a monstrous stalker in pursuit. Climb up the ladders to reach the high-up platforms to buy yourself some to get some shots off, and use the the zip lines to make a quick getaway when the giant begins shaking the structure. The strategy for terminating this thing is largely the same as when you fought an El Gigante nearer the start of the game, to be honest. These 'twins' are a bit stronger, mind, so expect to expend a little more ammo than you might have before. Flash grenades are still a great idea, if only to disorientate the monster and buy you some time to fill him with bullets.
Alternatively, if you happen to have a rocket launcher handy, it is possible to kill the two El Gigantes by firing off a rocket into the middle of them, when they're both in close approximation, and having the explosion instantly kill both of them. Of course, purchasing the rocket launcher from the Merchant means you negate the 30,000 PTAS reward you receive from killing the behemoths. This is perhaps the quickest method of ending the fight, though. Your choice.
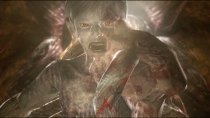
Encountered: At the very end of Chapter 4-4.
As nightmarish as the result of splicing Ramon Salazar, a Verdugo and a Queen Plagas might be, thankfully, it's not nearly as problematic a boss encounter as one might think. The goal is to get the mutated Salazar portion of the abomination to reveal himself, but he'll only do so after you've done some damage to the engorged Verdugo head. Don't bother attacking the two tentacles situated either side of the boss, just focus all of your efforts on that scary-looking eye of the Verdugo and entering the correct commands to evade the tentacle swipes and slams. Also make sure to have your wits about you for when the Verdugo head begins to split down the middle, because that means an insta-kill attack is cooking up and you will need to run out of the way before the monster can gobble you up with its snapping split-mouth manoeuvre.
When you've dealt enough damage to the Verdugo part, Salazar will temporarily come into view and become vulnerable. One rocket launcher blast will end the boss fight there and then, but I'd recommend you save it for later on, if you have one, and instead take advantage of the Broken Butterfly's awesome power.* You might only be able to get a few shots off before Salazar retreats behind the Vergudo head once more, but you'll likely only need repeat the process a few times before the boss throws in the towel. If the monster is able to strike you with one of its tentacles, there's a good chance that you'll be sent flying down into the pit below, where a bunch of parasites are roaming around. Chuck a flash grenade to all of them in the vicinity, collect their treasures and climb up a nearby ladder to continue the fight with Salazar. It's really very straight forward.
* If you should die against the boss, do make sure to visit the nearby Merchant and start upgrading that Broken Butterfly.
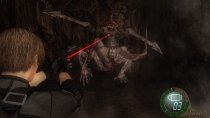
Encountered: Halfway through Chapter 5-3.
Whilst the U-3 monster might look like the most horrifying thing you've ever clapped eyes on, you might be relieved to learn that the monster's bark is far worse than its bite. For the sake of breaking down your battle with this monster, think of the first half of the fight as being the "bark" part, and the later half the "bite" part. The "bark" portion consists of you being tasked with traversing through a series of maze-like hanging structures and dodging the occasional — but still oh-so tedious — QTE attack. For the most part, the monster will remain hidden in the rafters, so you'll be free to concentrate of breaking the green lights and fiddling with the control panels that are scattered about, but it will occasionally jump down to your level for a bit of a scrap. It's possible to complete this part without even firing a single bullet at the creature, if you're quick on your feet and don't dilly-dally, but don't fret if you have to spare a shotgun shell or two in order to send it retreating off into its hidey-hole for a short while.
When you've reached the solid ground, that'll be when the final, "bark" segment, if you will, of the battle begins and you'll be expected to face this thing head-on. The monster is limited almost entirely to short-range swipes, so ensure that there's plenty of distance between you and it's insanely large pincers. Don't bother with sniper rifles as they take too long to operate, rely on your trusty Broken Butterfly and your shotgun as a substitute, and concentrate on shooting the huge parasite on the monster's back. Make use of the levers in the cave's tunnel to temporarily separate you and the creature with some sturdy steel bars, but don't expect them to last too long; use the time to get a few valuable pot shots off. If you can deal enough damage, the creature will keel over for a brief moment, also allowing you some breathing space to unload the ammo of your preferred weapon into its weak spot. On the easier difficulty settings, blowing up the red barrel near the cliff-edge whilst the creature is nearby will usually briefly incapacitate it, but I wouldn't expect as much on the Professional setting.
After you've dealt enough damage, the monster will begin employing a new attack: a subterranean sneak attack. When it goes underground, expect a QTE to follow shortly after, one whereby the monster will attempt a cheeky pop-up attack before properly re-emerging. They're a nuisance, primarily because you can't harm the monster while it's below the surface, but they're easy enough to avoid.
Keep at it, stay on the move, and make the most of that Broken Butterfly, and the fight shouldn't drag on for too long.

Encountered: At the very end of Chapter 5-3.
Prepare for a long, drawn-out scrap with Krauser, whereby the bare-chested mercenary will have you jump through a few hoops before he'll be prepared to face you in a battle to the death. The first portion of the fight requires that you defend yourself against the man's frequent attacks, all while attempting to track down the necessary 'Piece of the Holy Beast' items to progress to each subsequent area. As you go about your business, locating the items scattered throughout the ruins, he'll occasionally charge in, looking to initiate an in-your-face knife fight, but a few quick swipes with your blade to his face will usually be enough to deter the chap and have him retreat to safety for a short while. Watch out for the odd QTE here and there, as well as a handful of high-tech toys lying in wait, looking to blow up when you enter their proximity.
When he's not looking for a close-quarters duel, he'll hide behind cover and blaze away with his assault rifle, launch a few explosive arrows from his bow, or chuck a grenade in your direction; both of these attacks can potentially deal a tremendous amount of damage, so you'll want to be lively on your toes to avoid them.
Upon reaching the highest platform of the dilapidated tower and claiming the 'Piece of the Holy Beast, Eagle', it'll be then that Krauser finds a backbone and agrees to fight Leon head-on. Don't let the time limit intimidate you, you'll be able to finish him off wit plenty of time to spare if you go on the offensive. Equip your most powerful shotgun, as, while not as mighty as, say, the Broken Butterfly, the spread of the weapon's projectiles will mean that your shots are much more likely to hit an area of Krauser's body that is not shielded by his mutated arm. His legs are perhaps the most vulnerable, and, after having received a certain amount of damage, will mean that Krauser will temporarily drop to his knees and be prime for some handy magnum bullets to the kisser. Don't let him get too close, mind, as Krauser has a tendency to perform a roundhouse kick-like manoeuvre whenever he's given the chance. Other than that, he mostly relies on trying to catch you off-guard with those ever-tedious QTEs. Stay alert, and it won't be an especially difficult task to defeat Krauser without receiving even a modicum of damage.
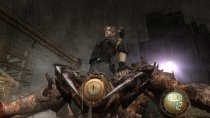
First encountered: Final Chapter.
Disappointingly, Saddler's bark is much worse than his bite. He's really quite tame when compared to some of the previous bosses that you've faced. And, if you've saved up a fair amount of hand grenades up until this point, he's no really going to be that much of a challenge for you. Here's the gist of it: keep enough distance so that he can't swipe at you with his tendrils, but don't nip off too far otherwise he'll start chucking girders at you, which are extremely difficult to dodge unless you're very lively at responding to the QTE prompts. Either shoot any one of the four smaller tendril-eyes that he'll momentarily expose to you, or throw a grenade in his general direction. A well-placed shot or nearby explosion will temporarily down him and allow you a chance to "climb" him and stab him in his weakest spot: his mouth-eye. Once you begin the "climb", it's all automated; it's essentially giving you a free hit which causes massive damage. There is one attack you'll need to be cautious of, mind, and that'll be the one where he charges you relentlessly until he dishes out some damage. When he starts furiously stamping on the floor with his tendrils, that's your cue to ready that next grenade for when he launches himself at you.
If you're begin to run low on grenades or ammo, you can always lure Saddler towards either of the two explosive barrels or one of the crane controls located towards the outskirts of the construction site. The explosive barrels down him like a grenade would, and the crane controls will smash a collection of girders into him if you're able to time it just right. Saddler really isn't difficult enough to warrant going out of your way to bother with either of these environmental aids, though, so just concentrate of chucking grenades and performing that fancy knife stab manoeuvre whenever you get the chance. Rinse, wash, and repeat.
Eventually, Ada will provide you with a rocket launcher, a special one, powerful enough to kill the enemy in one shot. However, I'd advise you hang on to it as, at this point, Saddler won't have an awful lot of health left, and you'd be better off keeping it in your inventory and carrying it over to your next game. Just keep nailing Saddler with those grenades; easy peasy.
Note: There is one major annoyance that can sometimes occur when battling Saddler, however, and, while rare, it can be the catalyst for some enormous headaches. Occasionally, if you happen to try to run under his tendril-feet things, he'll manage to get a few free hits off at you and you'll usually be unable to move while he's doing it. Always run around him when you absolutely must flee, especially if you don't want this particularly ugly boss to defeat you with some extremely cheap tactics.
Del Lago

Encountered: At the very end of Chapter 1-3.
Thankfully, your first boss is also the easiest one in the game. All that is required of you is to chuck a load of spears at the monster whilst simultaneously making sure you don't become its supper. It's recommended that you only attempt to throw the spears when the monster has its back to you, dragging you along with it, as this is the time where it is most vulnerable. When it's not pulling you along in your rickety little boat, it'll likely be pulling a U-turn and trying to catch a quick nibble of you. If it does — no problem. You'll need to bash away at a certain button to return to your boat before the creature can catch you, but it's not especially difficult to dodge its attack, in truth. Simply holding down either the left or right button on your D-pad when the monster is submerged will allow you to evade the monster's lunge attacks.
A few spear-chucks later, and the Del Lago will try a charge attack. You'll know when it's about to attempt this when your boat is suddenly immobilized and all appears still and quiet in the water. On-screen prompts will notify you as to where the monster will be charging in from, and you'll have more than enough time to launch a spear into its gob. You only need to hit it once during its run-up to have it abandon its charge, and it's not exactly a difficult target to miss, given its humongous size.
In summary: Repeat these steps until the beast's death: chuck arrows at the monster while it's pulling your board, hold either left or right on the D-pad while its submerged (but still dragging you), throw a spear or two into its mouth while you're stationary and it's swimming towards you. Easy peasy.
El Gigante

Encountered: Roughly three-quarters of the way through Chapter 2-1, after acquiring the Round Insignia.
Don't bother hiding in any of the three shacks — El Gigante, despite looking a bit dippy, is clever enough to squash them with you inside. Your best bet is to keep plenty of space between the two of you and rattle off a few rounds into his mutated centipede-like spine whenever he's not within swinging, smashing, or stamping distance. There isn't an awful lot of strategy involved with defeating the creature, to be honest. Just make sure to watch out for those QTEs infrequently popping up, whereby he'll either attempt to charge into you or throw something quite large in your direction. If you, for whatever reason, attempt to get too close, he will grab and crush you with his hands, potentially dealing a tremendous amount of damage, and requiring you to engage in yet another infuriating QTE sequence to escape.
When he's taken enough bullets, the monster will drop to his knees, exposing the huge, vulnerable parasite on his back. At this point, he'll be rendered immobile. Race up to him and follow the sequence of button prompt that appear on-screen to deal a great deal of damage to him.
If you were kind enough to rescue the wolf during the first chapter by releasing him from the bear trap, then your four-legged friend will, partway into the battle, turn up to keep the monster distracted while you squeeze off a few much-needed slugs, uninterrupted. The dog is invincible, too, so you needn't worry about the little fella.
He can still be a wee bit tricky, though, on the Professional difficulty, especially. Do bear in mind that if you really aren't having much luck with taking this literal giant down, you canalways return to the nearby Merchant to either upgrade your current weapons or purchase a rocket launcher — a weapon capable of killing El Gigante in one hit.
El Gigante (Again)

Encountered: Near the beginning of Chapter 2-3, but only upon choosing the right-side path.
It's difficult to call this second confrontation with an El Gigante a "boss battle", as you can, if you so wish, just run away and escape without firing a single shot or taking even a scrap of damage. In fact, I'd strongly urge you to just flee from him. If you have spare rocket launcher handy, then, sure, go nuts and blow him away to receive a handy 15,000 PTAS, but you're better off just making a dash for the exit and hurriedly picking up any treasure along the way as you go.
Chief Mendez

Encountered: Near the end of Chapter 2-3.
He's a big guy, that much is true, but he shouldn't give you much grief — at least during the first half of the fight. When the battle begins, immediately spin around and climb the ladder which leads to the second floor of the barn. From here, it's just a case of positioning yourself in such a position whereby you can see over the lip of the second floor, down to the floor below where the boss will remain, getting a few shots off before Mendez can get too close, then dash to a different point to repeat the procedure. If you have a plentiful reserve of bullets and time on your hands, then use the handgun, otherwise, opt for the shotty. Do bear in mind, though, that staying in the same place for too long will result in Mendez getting close enough to hack away at you and you'll just end up taking too much damage. He moves slow, so don't feel that you need to hurry too much — you should be able to get 3-6 shots off on average if you play it cool and take your time. With the shotgun, if you can pump 3-4 shots into him in succession, Mendez will be momentarily stunned, allowing for you to get one or two bonus shells into him.
If you do get hit, you'll end up being knocked down to the floor below, where you will need to race your way back to the second floor before Mendez can grab you and deal a shed load of damage. Be quick.
The second half of the battle will consist of a now-legless-Mendez swinging from various beams and trying to get close to you so that he can slash at you with his tendril. Whenever he retreats to the rafters, use this as your opportunity to dash to the opposite end of the barn. He'll eventually drop to beams nearer to your level and will swing towards you, use this time to get unload some shotgun shells into him. If he gets to close, chuck a flash grenade to temporarily immobilize him and get to work with your shotty. He'll repeat his pattern of retreating to the rafting and flanking you until dead, so don't worry about any nasty surprises — he's quite a straightforward boss, really.
Note: Don't bother using the rocket launcher, it won't be an instant kill. It'll hurry things along onto the second half of the fight, but considering that the first half isn't especially difficult, it just wouldn't make for a cost-effective strategy.
Garrador

Encountered: In the prison area, towards the end of Chapter 3-1.
The Garrador is perhaps more of a mini-boss than anything else, but he'll certainly give most unsuspecting gamers a run for their money if they attempt to tackle him unprepared. Here's the deal (and this strategy is largely the same for most every dealing you might have with him): he's blind. You could be standing 15-feet in front of him and he'll have no clue that you're there. Having said that, his hearing is frighteningly acute. Whilst fighting this monster, don't even think about running, unless he's either flailing from injury, fighting to free himself after burying his claws from the wall, or preoccupied with those ringing bells. I'd suggest going no faster than a brisk walking pace when making your way around the dungeon. His attacks consist of either a wild barrage of slashes, or a charge attack followed by a barrage of slashes.
His weakness, you see, is that vulnerable little parasite on his back. You can't miss it, it's practically calling out to you with in its own vile, pulsating way. Getting him to expose his back requires that you keep the noise down so that he might believe that you've escaped. In which case, he'll continue his patrol and will inevitably have his back to you before long. Whip out your trusty shotgun and fire off a blast into the parasite before he becomes wary of your plan. Do please bear in mind that, even when walking, getting too close to the Garrador will result in the creature launching into a nightmarish thrashing of sharp metal.
Another perfectly viable — and recommended — tactic would be to make use of those two large bells situated on opposite walls of this area. Shooting them from a distance with your pistol will cause the monster to lunge frantically towards the bell, leaving his weak spot open to attack. Unfortunately, the bells will only be able to act as a diversion for so long before the Garrador completely destroys them.
And the third, equally suitable solution for distracting the Garrador would be to make some distance between yourself and him, fire off a single handgun round into any part of him (ideally the parasite if you can) and race out of the way before he comes storming his way into your direction. He moves fast, so you'll need to act fast. Provided you were able to steer clear of his attack, there's a good chance that he'll have have shot right past you and managed to get his claw lodged into the wall. Use this opportunity to get off another shot or two.
Stick to those three strategies and you'll be as right as rain.
Verdugo

Encountered: Towards the end of Chapter 4-1.
Even though Salazar's "Right Hand" will have been chasing your beforehand, tormenting you with incessant QTEs, the fight only really properly begins when you've thrown the switch and restored the elevator power; it'll be then that the creature skulks out of the shadows and reveals himself, so to speak. Before the actual fighting part between the two of your commences, know that you're trapped in a very small, very cramped arena with which to battle the monster. If you don't happen to have any demolition weapons on you, such as a rocket launcher, mine thrower or even grenades, then you'd probably be better off saving whatever remaining munitions you have and riding out the fight by running around the central generator, in circles, until the shutter door opens once again, allowing for your escape. You'll also be wanting to occasionally knock over the liquid nitrogen canisters lying around here and there, as the monster approaches, in order to temporarily freeze it and grant some fleeting time to yourself.
Otherwise, if you do have the firepower handy and fancy scoring yourself a very rare 'Crown Jewel' treasure, you might as well make use of that rocket launcher that you should have picked up during Chapter 3-4. Firstly, when the boss battle begins, race past the monster and push over the first liquid nitrogen canister you come across, as you're being stalked, causing the cannister to expel its chilling charms and immobilize the creature. Use this opportunity to sling out the ever-reliable rocket launcher and blow the thing to kingdom come, killing it with a single, satisfying rocket blast. The Verdugo simply has far too much health and armour for you to even consider using most every other weapon, including the Broken Butterly.
El Gigante Twins

Encountered: Halfway through Chapter 4-2.
As terrifying as the premise might first sound, battling two El Gigantes can be made all the more easier by making use of the trapdoor in the centre of the room: Lure an unsuspecting El Gigante over the hatch, flip the nearby switch, and watch as it plummets into the lava pit below to be slowly incinerated. However, please note that making use of this trick will mean that your 30,000 PTAS reward for killing the monsters will be halved, with 15,000 PTAS literally go up in flames; it's still a much more appealing option to fighting the two ogres head-on. If you fancy a challenge and want to take the pair of them on: jolly good luck to you. You'll need to make full use of your Broken Butterly and make sure to be quite lively on your toes. We'd recommend taking advantage of the lava method, in truth, and making life much easier to only having to contend with one enemy to fight. Unfortunately, the lever will become 'locked' after eliminating the first monster, so don't rely on it to save your skin against both of them.
If you do happen to go ahead with our preferred approach of using the lava to your advantage, make sure not to go too near the pit while the trapdoor is open, or the monster will reach out, grab you and pull you in. Give it some time for the giant to finish flailing and for the hatch to close by itself. Once the doors have slammed shut, you'll be free to roam the chamber as you please, albeit as freely as one can do with a monstrous stalker in pursuit. Climb up the ladders to reach the high-up platforms to buy yourself some to get some shots off, and use the the zip lines to make a quick getaway when the giant begins shaking the structure. The strategy for terminating this thing is largely the same as when you fought an El Gigante nearer the start of the game, to be honest. These 'twins' are a bit stronger, mind, so expect to expend a little more ammo than you might have before. Flash grenades are still a great idea, if only to disorientate the monster and buy you some time to fill him with bullets.
Alternatively, if you happen to have a rocket launcher handy, it is possible to kill the two El Gigantes by firing off a rocket into the middle of them, when they're both in close approximation, and having the explosion instantly kill both of them. Of course, purchasing the rocket launcher from the Merchant means you negate the 30,000 PTAS reward you receive from killing the behemoths. This is perhaps the quickest method of ending the fight, though. Your choice.
Ramon Salazar

Encountered: At the very end of Chapter 4-4.
As nightmarish as the result of splicing Ramon Salazar, a Verdugo and a Queen Plagas might be, thankfully, it's not nearly as problematic a boss encounter as one might think. The goal is to get the mutated Salazar portion of the abomination to reveal himself, but he'll only do so after you've done some damage to the engorged Verdugo head. Don't bother attacking the two tentacles situated either side of the boss, just focus all of your efforts on that scary-looking eye of the Verdugo and entering the correct commands to evade the tentacle swipes and slams. Also make sure to have your wits about you for when the Verdugo head begins to split down the middle, because that means an insta-kill attack is cooking up and you will need to run out of the way before the monster can gobble you up with its snapping split-mouth manoeuvre.
When you've dealt enough damage to the Verdugo part, Salazar will temporarily come into view and become vulnerable. One rocket launcher blast will end the boss fight there and then, but I'd recommend you save it for later on, if you have one, and instead take advantage of the Broken Butterfly's awesome power.* You might only be able to get a few shots off before Salazar retreats behind the Vergudo head once more, but you'll likely only need repeat the process a few times before the boss throws in the towel. If the monster is able to strike you with one of its tentacles, there's a good chance that you'll be sent flying down into the pit below, where a bunch of parasites are roaming around. Chuck a flash grenade to all of them in the vicinity, collect their treasures and climb up a nearby ladder to continue the fight with Salazar. It's really very straight forward.
* If you should die against the boss, do make sure to visit the nearby Merchant and start upgrading that Broken Butterfly.
U-3 / 'It'

Encountered: Halfway through Chapter 5-3.
Whilst the U-3 monster might look like the most horrifying thing you've ever clapped eyes on, you might be relieved to learn that the monster's bark is far worse than its bite. For the sake of breaking down your battle with this monster, think of the first half of the fight as being the "bark" part, and the later half the "bite" part. The "bark" portion consists of you being tasked with traversing through a series of maze-like hanging structures and dodging the occasional — but still oh-so tedious — QTE attack. For the most part, the monster will remain hidden in the rafters, so you'll be free to concentrate of breaking the green lights and fiddling with the control panels that are scattered about, but it will occasionally jump down to your level for a bit of a scrap. It's possible to complete this part without even firing a single bullet at the creature, if you're quick on your feet and don't dilly-dally, but don't fret if you have to spare a shotgun shell or two in order to send it retreating off into its hidey-hole for a short while.
When you've reached the solid ground, that'll be when the final, "bark" segment, if you will, of the battle begins and you'll be expected to face this thing head-on. The monster is limited almost entirely to short-range swipes, so ensure that there's plenty of distance between you and it's insanely large pincers. Don't bother with sniper rifles as they take too long to operate, rely on your trusty Broken Butterfly and your shotgun as a substitute, and concentrate on shooting the huge parasite on the monster's back. Make use of the levers in the cave's tunnel to temporarily separate you and the creature with some sturdy steel bars, but don't expect them to last too long; use the time to get a few valuable pot shots off. If you can deal enough damage, the creature will keel over for a brief moment, also allowing you some breathing space to unload the ammo of your preferred weapon into its weak spot. On the easier difficulty settings, blowing up the red barrel near the cliff-edge whilst the creature is nearby will usually briefly incapacitate it, but I wouldn't expect as much on the Professional setting.
After you've dealt enough damage, the monster will begin employing a new attack: a subterranean sneak attack. When it goes underground, expect a QTE to follow shortly after, one whereby the monster will attempt a cheeky pop-up attack before properly re-emerging. They're a nuisance, primarily because you can't harm the monster while it's below the surface, but they're easy enough to avoid.
Keep at it, stay on the move, and make the most of that Broken Butterfly, and the fight shouldn't drag on for too long.
Jack Krauser

Encountered: At the very end of Chapter 5-3.
Prepare for a long, drawn-out scrap with Krauser, whereby the bare-chested mercenary will have you jump through a few hoops before he'll be prepared to face you in a battle to the death. The first portion of the fight requires that you defend yourself against the man's frequent attacks, all while attempting to track down the necessary 'Piece of the Holy Beast' items to progress to each subsequent area. As you go about your business, locating the items scattered throughout the ruins, he'll occasionally charge in, looking to initiate an in-your-face knife fight, but a few quick swipes with your blade to his face will usually be enough to deter the chap and have him retreat to safety for a short while. Watch out for the odd QTE here and there, as well as a handful of high-tech toys lying in wait, looking to blow up when you enter their proximity.
When he's not looking for a close-quarters duel, he'll hide behind cover and blaze away with his assault rifle, launch a few explosive arrows from his bow, or chuck a grenade in your direction; both of these attacks can potentially deal a tremendous amount of damage, so you'll want to be lively on your toes to avoid them.
Upon reaching the highest platform of the dilapidated tower and claiming the 'Piece of the Holy Beast, Eagle', it'll be then that Krauser finds a backbone and agrees to fight Leon head-on. Don't let the time limit intimidate you, you'll be able to finish him off wit plenty of time to spare if you go on the offensive. Equip your most powerful shotgun, as, while not as mighty as, say, the Broken Butterfly, the spread of the weapon's projectiles will mean that your shots are much more likely to hit an area of Krauser's body that is not shielded by his mutated arm. His legs are perhaps the most vulnerable, and, after having received a certain amount of damage, will mean that Krauser will temporarily drop to his knees and be prime for some handy magnum bullets to the kisser. Don't let him get too close, mind, as Krauser has a tendency to perform a roundhouse kick-like manoeuvre whenever he's given the chance. Other than that, he mostly relies on trying to catch you off-guard with those ever-tedious QTEs. Stay alert, and it won't be an especially difficult task to defeat Krauser without receiving even a modicum of damage.
Saddler

First encountered: Final Chapter.
Disappointingly, Saddler's bark is much worse than his bite. He's really quite tame when compared to some of the previous bosses that you've faced. And, if you've saved up a fair amount of hand grenades up until this point, he's no really going to be that much of a challenge for you. Here's the gist of it: keep enough distance so that he can't swipe at you with his tendrils, but don't nip off too far otherwise he'll start chucking girders at you, which are extremely difficult to dodge unless you're very lively at responding to the QTE prompts. Either shoot any one of the four smaller tendril-eyes that he'll momentarily expose to you, or throw a grenade in his general direction. A well-placed shot or nearby explosion will temporarily down him and allow you a chance to "climb" him and stab him in his weakest spot: his mouth-eye. Once you begin the "climb", it's all automated; it's essentially giving you a free hit which causes massive damage. There is one attack you'll need to be cautious of, mind, and that'll be the one where he charges you relentlessly until he dishes out some damage. When he starts furiously stamping on the floor with his tendrils, that's your cue to ready that next grenade for when he launches himself at you.
If you're begin to run low on grenades or ammo, you can always lure Saddler towards either of the two explosive barrels or one of the crane controls located towards the outskirts of the construction site. The explosive barrels down him like a grenade would, and the crane controls will smash a collection of girders into him if you're able to time it just right. Saddler really isn't difficult enough to warrant going out of your way to bother with either of these environmental aids, though, so just concentrate of chucking grenades and performing that fancy knife stab manoeuvre whenever you get the chance. Rinse, wash, and repeat.
Eventually, Ada will provide you with a rocket launcher, a special one, powerful enough to kill the enemy in one shot. However, I'd advise you hang on to it as, at this point, Saddler won't have an awful lot of health left, and you'd be better off keeping it in your inventory and carrying it over to your next game. Just keep nailing Saddler with those grenades; easy peasy.
Note: There is one major annoyance that can sometimes occur when battling Saddler, however, and, while rare, it can be the catalyst for some enormous headaches. Occasionally, if you happen to try to run under his tendril-feet things, he'll manage to get a few free hits off at you and you'll usually be unable to move while he's doing it. Always run around him when you absolutely must flee, especially if you don't want this particularly ugly boss to defeat you with some extremely cheap tactics.
Last edited: